
If you've ever opened an overhead cabinet in a moving RV and caught a flying can of beans, you already know the struggle. RV/tiny home organization isn't a storage problem. It's a physics problem.
The walls curve, the floors vibrate, and every square inch does double duty. As of 2026, NFPA 1192 still governs RV construction, setting strict rules on ceiling heights, exit access, and appliance ventilation that shape where you can store what. Understanding those dimensions matters more than buying another bin.
In our research, the most common frustration isn't lack of ideas. It's that standard home-organizing advice fails the road test. A cute basket from a big-box store won't survive a hard brake.
A heavy crock left on a counter becomes a projectile. The good news? Once you understand the spatial rules of small, moving homes, the whole process gets simpler.
Let's walk through it zone by zone.
Quick Answer
RV/tiny home organization means planning storage around weight, motion, and odd geometry. You measure first, then declutter, then contain. You anchor everything that moves.
You use vertical space and multifunctional furniture. The goal is a place for every item, secured against vibration and accessible in tight quarters. It's less about buying organizers and more about matching storage to the space.
Why RV and Tiny Home Organization Is Really a Visual Problem
Most organizing advice assumes rectangular rooms with stable floors. RVs and tiny homes don't work that way. Interior walls slope inward, ceilings curve, and storage bays sit at odd angles.
A shelf system designed for a suburban pantry simply won't fit, let alone function.
That's why the visual element matters. You can't organize what you can't see. In tight quarters, seeing everything is half the battle.
Clear containers, open shelving, and labeled bins turn a cramped cabinet into a navigable system. Manufacturer specifications indicate that typical RV overhead cabinets run only 9 to 12 inches deep. That's roughly the depth of a cereal box.
A photo or diagram of what fits where beats a hundred written tips.
The other challenge is motion. Your home isn't static. Every acceleration, turn, and bump redistributes whatever you stored.
Gravity is the enemy of organization. That's why tension rods, raised-edge trays, and positive-catch latches appear in every serious setup. They're not accessories.
They're safety equipment. A cabinet door that stays shut while driving is your first sign you got it right.
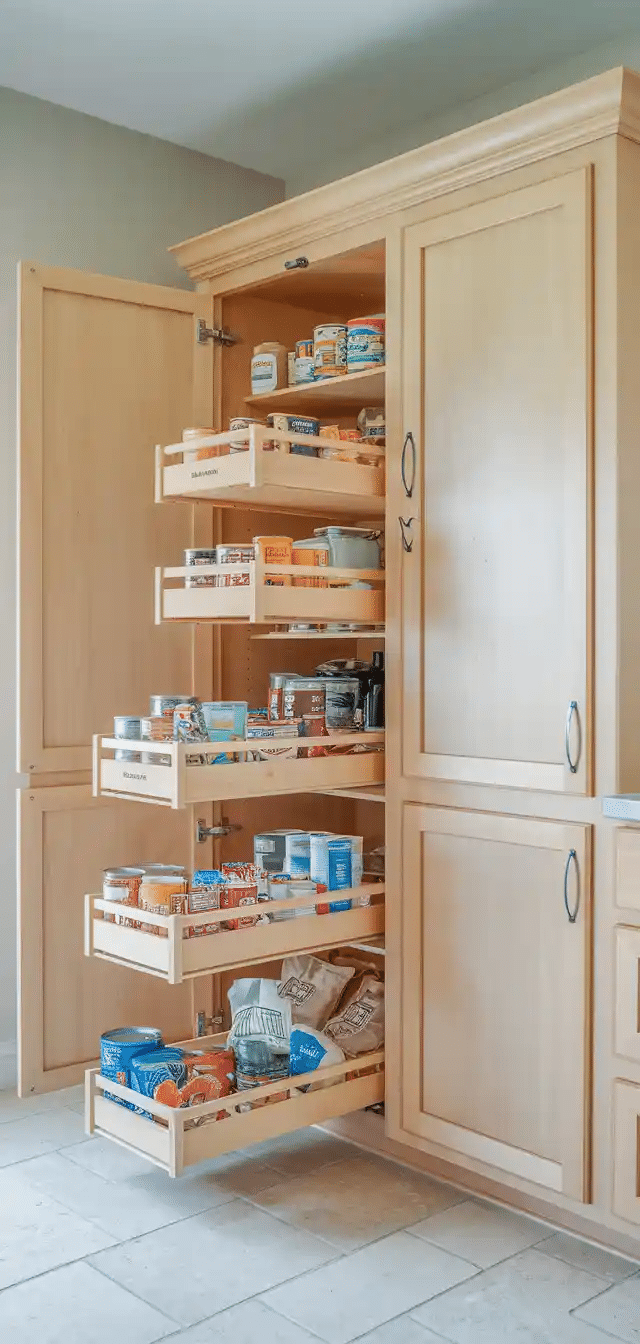
Image source: Web (Bing) / themegamom.com (Web image (fair-use with source credit))
The Seven Zones That Matter Most: Galley, Closet, Under-Bed, Overhead, Storage Bays, Loft, and Bathroom
Think of your RV or tiny home as seven distinct micro-spaces. Each one has unique constraints and needs its own organizing logic. Trying to apply one system everywhere is the fastest route to frustration.
Galley and Kitchen
The galley is the hardest-working zone. It also holds the heaviest and most fragile items. Stackable, hard-sided containers with airtight seals are your best friends here.
They maximize vertical space and keep food secure. Magnetic spice racks mounted on the back of a cabinet door free up shelf space while keeping cumin within reach. Lazy Susans in corner cabinets eliminate the black hole of forgotten canned goods.
The key metric is cabinet depth. Measure before you buy anything. A 12-inch-deep cabinet needs a 10-inch turntable, not an 11-inch one.
Closet and Wardrobe
RV closets are typically shallower than home closets. Standard hanging rods work, but you'll double your capacity with vertical shelf dividers and slim fabric bins. Vacuum compression bags are a game-changer for bulky jackets and bedding.
They shrink volume by roughly half, according to aggregate user reviews. Use a tension rod at chest height to create a second shelf for folded shirts. Never hang heavy coats on the rod without securing it to the wall framing.
That's a recipe for a midnight collapse.
Under-Bed Storage
Under-bed space is prime real estate, but it's rarely accessible from the top. Most travel trailers offer 8 to 10 inches of clearance. Low-profile, airtight boxes on wheels work best because they slide out without scraping your knuckles.
Reserve this zone for items you don't need mid-trip: off-season clothes, extra bedding, tools. Label the outside of each bin. You'll thank yourself at 11 p.m. in a dark campsite.

Image source: Web (Bing) / forestriverinc.com (Web image (fair-use with source credit))
Overhead Cabinets
Overhead cabinets are for light items only. Heavy cans and glass jars should live low, near the floor, to keep the rig's center of gravity stable. This is a safety issue, not just an organizational preference.
The Gross Vehicle Weight Rating (GVWR) label on your door frame tells you the maximum loaded weight of your RV. Overloading overhead storage pushes weight upward, which increases sway and rollover risk. Keep lightweight items like paper towels, plastic dishware, and dry snacks up top.
Add a positive-catch latch to every door. The factory latches often wear out after a few seasons.
Exterior Storage Bays
These basement compartments are great for gear, tools, and outdoor chairs, but they're not climate-controlled. Temperature swings cause condensation, which leads to rust and mold. Store items in sealed plastic totes, not cardboard boxes.
Add silica gel packets to absorb moisture. If you carry a propane tank, it must stay in its designated, ventilated compartment. Never store gas cans or fuel inside the living area.
That's a fire hazard and a violation of NFPA 1192 guidelines.
Loft Space in Tiny Homes
Lofts are perfect for sleeping and seasonal storage, but getting items up and down is awkward. Use lightweight fabric bins with handles. Heavy items are dangerous on a ladder.
Keep a small, dedicated bin for "loft only" items like extra pillows and off-season blankets. If the loft has a low ceiling, avoid storing anything you need daily. The crawl is not worth it.
Bathroom
Bathroom storage in an RV is notoriously tight. Tension rods create instant shelves inside the medicine cabinet. Over-the-door shoe organizers hold toiletries, hair tools, and cleaning supplies.
Use moisture-proof containers for anything that shouldn't get wet. A teak shower mat or a plastic caddy with drainage holes prevents soap bottles from floating in standing water. In humid climates, ventilate the bathroom after every shower.
Mold grows fast in dark, wet corners.
Step-by-Step: Measure, Declutter, Contain, Anchor, and Test Drive
Organization is a process, not a weekend project. Follow these five steps in order. Skipping one makes the rest less effective.
Step 1: Measure everything. Grab a tape measure and map out every cabinet, drawer, and bay. Write down interior width, depth, and height. Note obstructions like pipes, wires, and curved walls.
This step separates a successful setup from a Pinterest-inspired disaster. The measurements tell you exactly what container fits before you spend a dime.
Step 2: Declutter brutally. Small spaces punish duplicates. You don't need three spatulas or twelve coffee mugs. Pull everything out and sort into three piles: keep, donate, and toss.
Be honest about what you actually used in the past year. Rule of thumb: if it doesn't earn its cubic footage, it goes. Aggregate reviews of full-time RV dwellers consistently report that cutting belongings by half is the single most effective organization strategy.
Step 3: Contain with the right size. Now you have measurements and a shorter list of belongings. Buy containers that fit. Measure twice, order once.
Clear bins let you see contents without opening. Fabric bins conform better to curved walls than rigid plastic. Stackable options maximize vertical space.
For drawers, custom-cut foam inserts keep cutlery and tools from sliding around. They cost more than generic dividers but pay for themselves in reduced rattling.
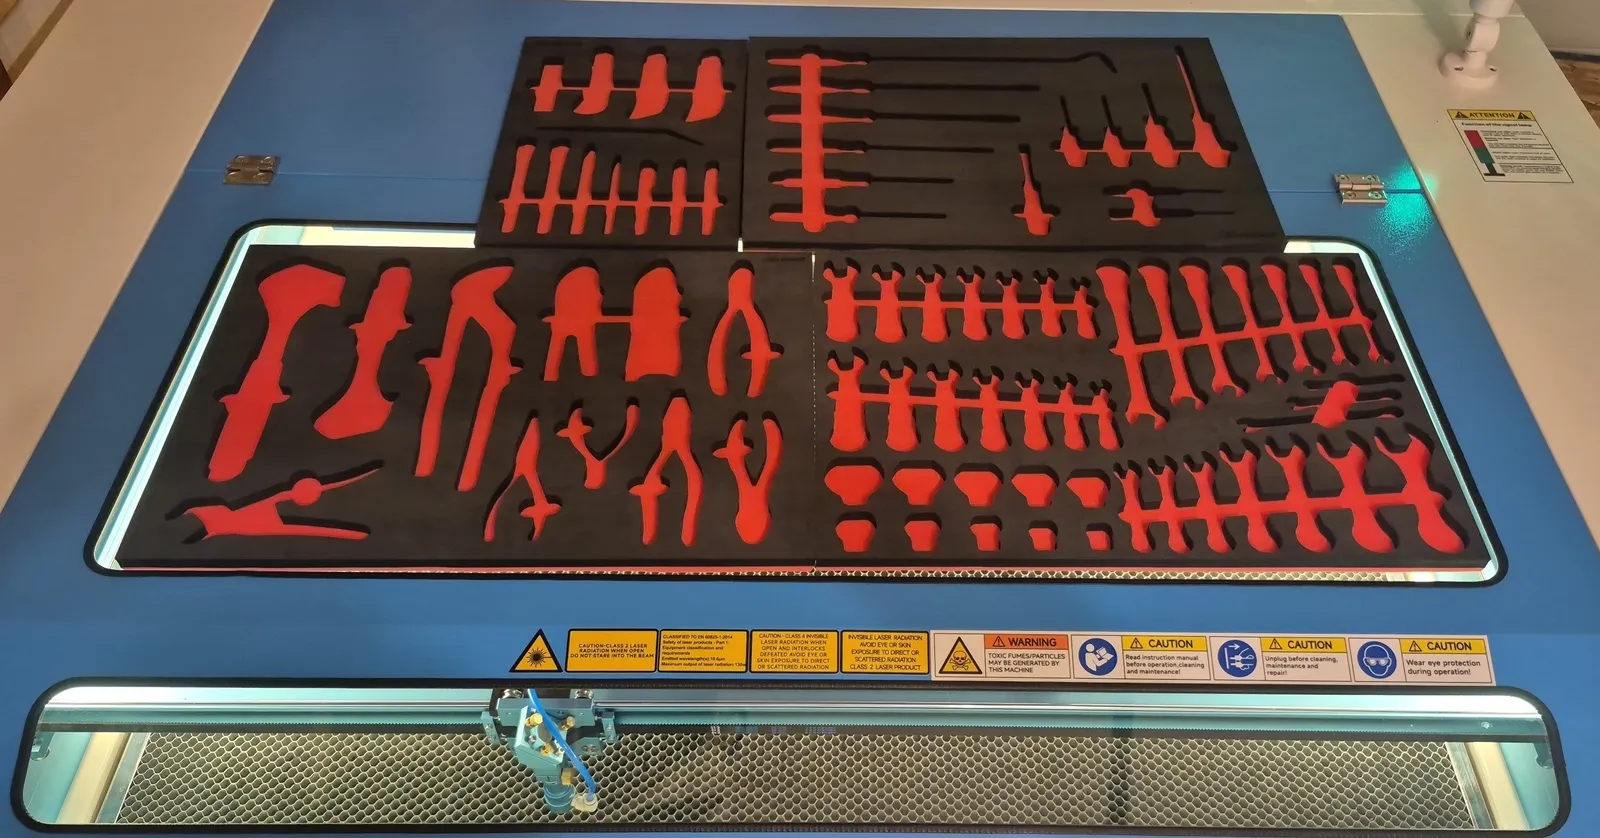
Image source: Web (Bing) / cribbitinserts.com (Web image (fair-use with source credit))
Step 4: Anchor everything. Non-slip drawer liners under every bin. Tension rods across pantry shelves to stop front-row cans from escaping. Rubber bungee cords across refrigerator shelves.
Raised edges on all trays. Command hooks rated for outdoor use hold lightweight items without damaging walls. Screw larger furniture into wall studs or RV wall framing to prevent tip-overs during transit.
This step is about safety, not neatness. RV manufacturers follow federal safety standards for interior fixtures, and they're not optional.
Step 5: Test drive. Take a short trip and see what moves. That's your real-world audit. After 50 miles, open every cabinet and identify the failures.
Adjust, re-anchor, and go again. It usually takes two or three shakeout trips before your system is solid. This step is the one most people skip, and it's exactly why their organizational systems fail by mile 20.
Visual Tricks That Make a 200-Square-Foot Space Feel Bigger
You can't knock down walls in an RV, but you can trick your eye. The right visual strategies make a tiny space feel significantly larger. This isn't decoration.
It's functional psychology.
Light colors expand. White and light wood cabinets reflect more light than dark finishes. If you're renovating, this matters. A 200-square-foot space with white upper cabinets feels twice as open as the same space in walnut.
Paint is cheap. Remodeling cabinetry is expensive. Start with paint.
Mirrors multiply space. A full-length mirror on a closet door creates the illusion of depth. Reflective backsplashes in the galley bounce light around. The best part?
Mirrors don't take up a single cubic inch of storage.

Image source: Web (Bing) / au.pinterest.com (Web image (fair-use with source credit))
Murphy beds and folding tables. Convertible furniture is the backbone of tiny living. A Murphy bed folds into the wall, freeing the floor during the day. Folding tables drop down when you need them and tuck away when you don't.
The vertical space you reclaim is astonishing. The International Code Council's Appendix Q, which governs tiny house residential construction, requires lofts and fold-down furniture to meet specific ceiling clearances. That's how standard this approach has become.
Open shelving beats closed cabinets. In a small space, closed cabinets feel like walls. Open shelves create sightlines that extend the room. Use them in the galley for dishes you use daily.
Yes, they require tidiness. But the payoff is a space that breathes.
Lighting changes everything. Warm LED strips under cabinets illuminate countertops. Battery-operated puck lights inside dark closets make them feel twice as large. In our research, the cheapest visual upgrade buyers report is replacing harsh fluorescent fixtures with warm LEDs.
It changes the entire mood of the rig for under $50.
Mistakes That Look Good in Photos but Fail on the Road
Social media is full of beautiful tiny-home interiors that never actually move. They're styled for photos, not for travel. Here are the most common mistakes we see repeated.
The open-shelf fallacy. A row of matching glass jars on open shelves looks gorgeous in an Instagram photo. On a gravel road, those jars become projectiles. Anything on an open shelf needs a raised edge or a bungee cord.
Magnetic strips hold knives and spice tins, but the magnets must be strong enough for the jolt of a pothole. Weaker magnets will dump your entire knife set onto the floor.
Overloading overhead bins. It's tempting to maximize every inch of cabinet space. But weight belongs low. Every pound you store above shoulder height raises the center of gravity.
That increases sway on the highway and makes a rollover more likely. Manufacturer specs and RV weight guidelines from the RV Industry Association both stress this. It's not about what fits.
It's about what's safe.
Rigid containers on curved floors. Hard plastic bins are great until they hit a curved wall or a wheel well. The bin doesn't flex, so the space is wasted. Fabric bins and collapsible options conform to odd shapes.
Match the container to the surface, not the other way around.
Skipping the test drive. The most common mistake by far is finishing the organization project and never driving it. Everything looks perfect in the driveway. It only takes one hard brake to scatter a year of organization.
Always test drive. Always adjust. The second shakeout trip will reveal what your system missed.
Ignoring ventilation. Sealed bins in exterior bays collect condensation. Fabric bins in a humid bathroom grow mold. Wooden items warp in damp climates.
Airflow is part of organization. Use vented containers, desiccant packs, and open doors periodically to let moisture escape. The U.S.
Department of Energy has extensive guidance on moisture control in small structures. Per their data, keeping indoor humidity below 60 percent prevents most mold issues. In an RV, where you might not have a dehumidifier, that means opening windows and hatches whenever the weather allows.
Real-Life Examples: The Weekend Camper, the Full-Timer, and the Loft Dweller
The Weekend Camper
You use your RV once a month, maybe twice. Your goals are simple: get out the door fast and not forget the coffee. For you, organization means pre-loading.
Keep bins labeled by activity. One for kitchen basics, one for outdoor gear, one for toiletries. Aggregate reviews from weekend campers show they cut setup time from 45 minutes to 15 with this system.
If you camp less than 10 weekends a year, skip the permanent storage overhaul. Portable, color-coded totes work better. You can move them from rig to rig without rebuilding anything.
The Full-Timer
Living in an RV year-round changes everything. Your rig is a home, not a toy. Weight distribution matters daily.
Your organization system needs to survive constant use and constant motion. The full-timers we researched keep heavy items in the lower bays and reserve overhead cabinets for paper goods. They rotate pantry stock on a first-in, first-out schedule.
And they run a shakeout drive every few months to catch loose items. If you're full-time, treat organization as a continuous process, not a one-time project. Your needs shift with seasons, guests, and hobbies.
The Loft Dweller
Tiny home lofts are charming but treacherous. Climbing a ladder with an armload of stuff is how injuries happen. Keep the loft for sleeping and two lightweight bins.
One for extra bedding, one for off-season clothing. Fabric handles matter. Heavy bins belong on the main floor.
If your loft has less than 24 inches of standing clearance, store only items you retrieve no more than once a week. The crawl isn't worth a daily strain.
Frequently Asked Questions
How much weight can I store in RV overhead cabinets?
Overhead cabinets hold about 20 to 30 pounds total, not per shelf. Check your owner's manual for the exact rating. Keep dense items like cast iron and canned goods in lower bays.
The higher the weight, the higher the center of gravity and the greater the rollover risk. When in doubt, put it low.
How do I prevent mold in RV storage compartments?
Keep humidity below 60 percent. Use vented bins, silica gel packs, and open exterior bays whenever the weather is dry. Never store damp items sealed away.
In humid climates, a small rechargeable dehumidifier placed in the bay works well. Check everything monthly, especially during spring on the road.
What's the best way to stop cabinet doors from opening while driving?
Replace weak factory latches with positive-catch or cam-style latches. Old latches wear out after a few seasons. Add a secondary rubber bungee or hook-and-loop strap across the door frame.
Always test drive after adjusting latches. If a door rattles, it's not fully secure.
How do I remember where I put things in my RV?
Label everything, even inside clear bins. Use a simple inventory list on your phone with one entry per bin and its location. Photos work even better.
Snap a quick picture of each cabinet's contents after organizing. You'll find items in seconds instead of digging through every drawer.
Should I use fabric or plastic bins in my RV?
Fabric bins work best in curved or sloped spaces because they flex. Plastic bins work better for heavy gear and exterior bays where moisture is a risk. Match the material to the location.
Fabric in closets and overhead cabinets, plastic in under-bed and outdoor storage areas.