
Small kitchen organization for renters usually starts with one annoying truth: you don’t need more cute baskets, you need a better system. If your counters are crowded, your cabinets are packed, and your lease says “no holes,” the goal is to make every inch work without risking your deposit.
Most base kitchen cabinets are about 24 inches deep, while many upper cabinets are about 12 inches deep, so depth matters as much as width. Before you buy anything, measure the space, check the lease, and sort your kitchen by how you actually cook. Let’s start with the fast answer.
Quick Answer
Small kitchen organization for renters works best with removable, no-drill storage. Start by decluttering before buying organizers. Measure cabinets, drawers, doors, and under-sink space.
Use zones for cooking, prep, cleaning, pantry, and food storage.
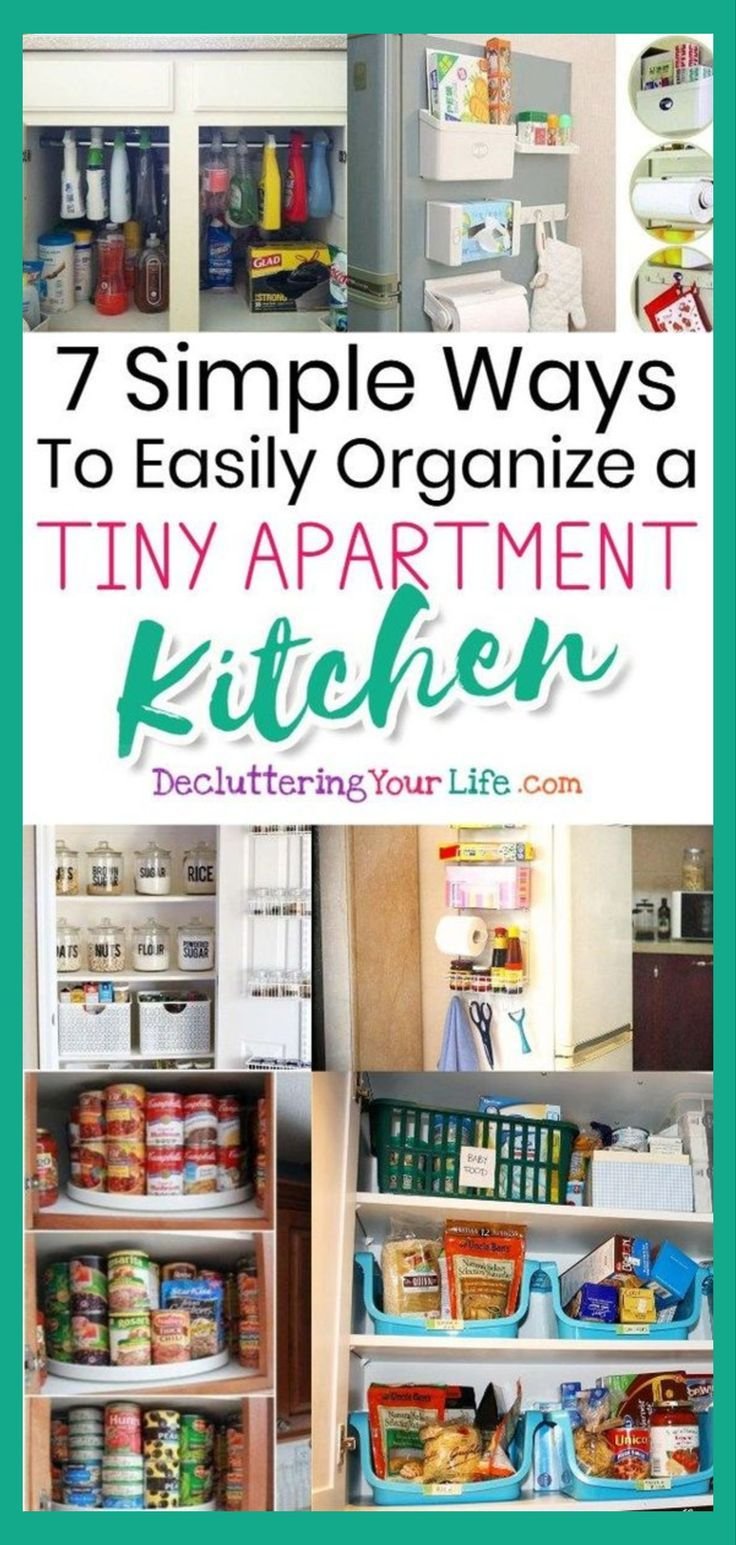
Image source: Bing (Web (fair-use with source credit))
Start With Your Rental Rules, Kitchen Layout, and Daily Cooking Habits
Your first decision is simple. If your lease bans drilling, skip screws, anchors, mounted rails, and wall shelves. Use freestanding, tension-mounted, over-door, magnetic, or removable adhesive storage instead.
That keeps your setup move-out friendly. It also saves you from patching holes, touching up paint, or arguing over cabinet damage later.
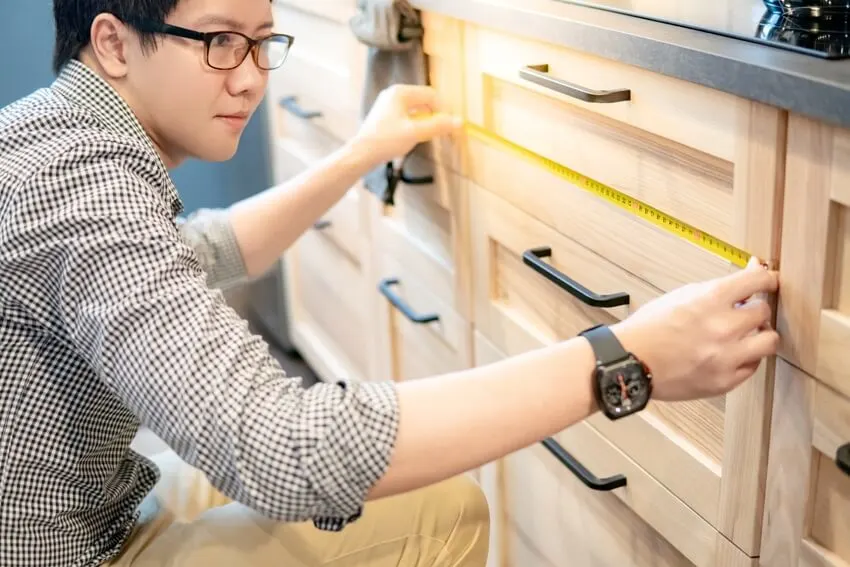
Image source: Web (Bing) / ar.inspiredpencil.com (Web image (fair-use with source credit))
Next, look at your kitchen layout. A galley kitchen needs slim vertical storage. A studio kitchen often needs closed bins to reduce visual clutter.
A kitchen with no pantry needs one dedicated cabinet, cart, or shelf to act like a pantry.
Measure before you choose anything. Manufacturer specifications for organizers almost always list width, depth, height, and weight capacity. Match those numbers to your actual cabinet interior, not the outside of the door.
| Measure this | Why it matters |
|---|---|
| Cabinet depth | Prevents pull-out bins from blocking doors |
| Drawer height | Stops dividers from scraping or jamming |
| Under-sink width | Leaves room for plumbing and garbage disposal |
| Door clearance | Keeps over-door racks from stopping closure |
| Shelf height | Helps you choose risers, bins, and stackable containers |
Then match storage to your habits. If you cook daily, pans, oils, spices, and prep tools deserve prime space. If you mostly reheat meals, food containers and microwave-safe dishes matter more.
A good small kitchen setup follows use, not appearance. Store items where your hands naturally reach for them.
Declutter First: What to Keep, Move, Donate, or Store Elsewhere
If your kitchen is already full, organizers won’t fix the real problem. They’ll just make clutter look tidier for two weeks. Start with a fast inventory before you spend money.
Pull out one category at a time. Do cookware first, then food containers, utensils, pantry goods, cleaning supplies, and small appliances. Don’t empty the whole kitchen unless you have several hours free.
Use this simple if/then filter:
- If you use it daily, keep it in easy reach.
- If you use it weekly, keep it in a cabinet or drawer.
- If you use it monthly, move it high, low, or farther away.
- If you haven’t used it in a year, donate it or store it elsewhere.
- If it’s broken, missing a lid, expired, or duplicated, let it go.
Food storage containers are usually the worst offender. Keep only matching sets with lids. Store lids vertically in a small bin or divider, not loose in a drawer.
Check pantry dates while you sort. The USDA Food Safety and Inspection Service gives food safety guidance that can help with storage habits, especially for refrigerated and frozen foods. As of 2026, clear “use first” bins are still one of the simplest ways to cut forgotten food waste.
Small appliances need the same treatment. If the air fryer, blender, toaster, rice cooker, and mixer all live on the counter, you’ve lost your prep space. Keep out only what you use most days.
Choose the Right Storage Fix for Your Biggest Kitchen Problem
The best fix depends on the exact problem. Don’t buy a rolling cart if the real issue is drawer chaos. Don’t decant every dry good if you barely cook from scratch.
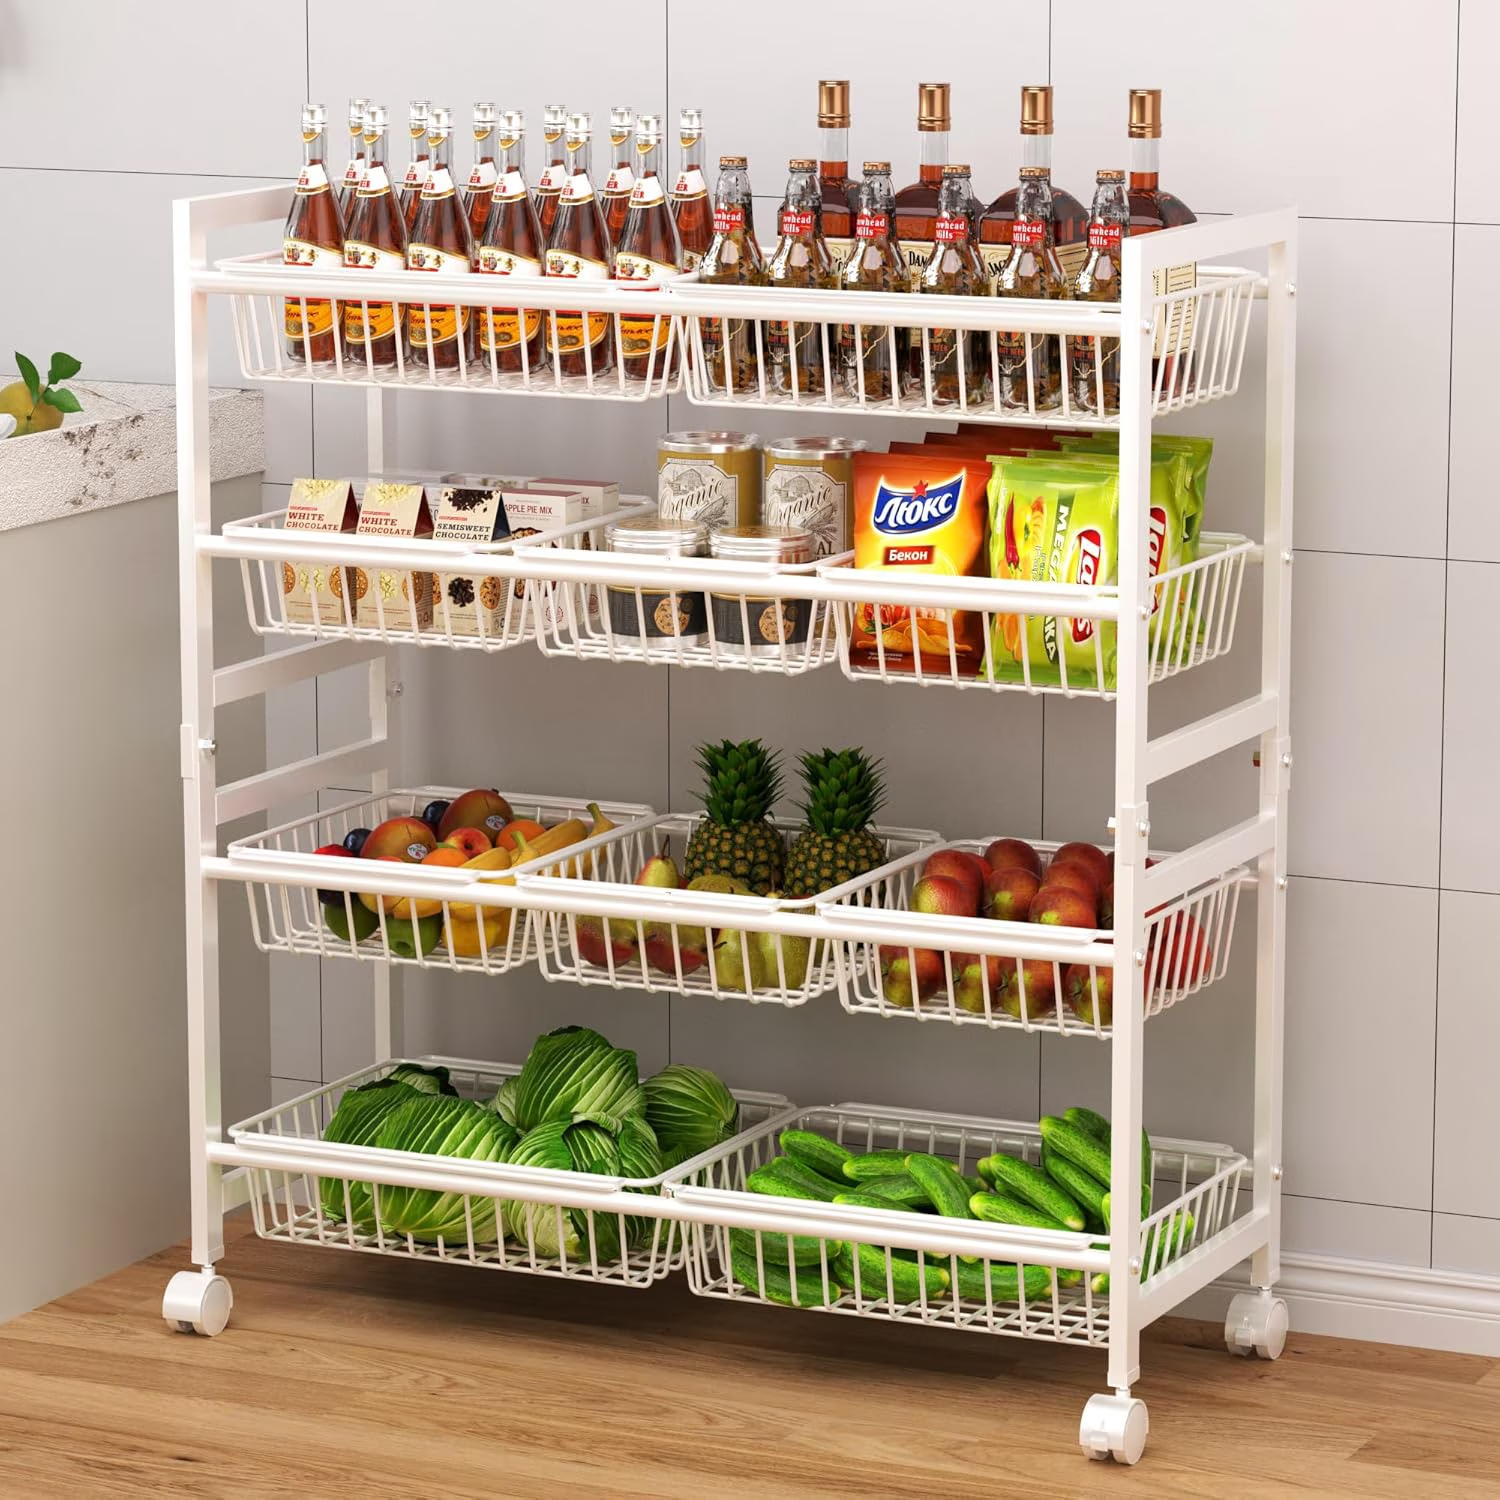
Image source: Web (Bing) / walmart.com (Web image (fair-use with source credit))
Here’s the practical decision tree.
| If your biggest issue is | Try this first |
|---|---|
| No pantry | Narrow rolling cart, freestanding shelf, or one pantry cabinet |
| Packed cabinets | Shelf risers, under-shelf baskets, stackable bins |
| Cluttered counters | Appliance limits and vertical storage |
| Tiny drawers | Expandable dividers and countertop utensil caddy |
| Messy under-sink area | Pull-out bin, cleaning caddy, moisture tray |
| Pots and lids everywhere | Vertical pan rack and lid divider |
If You Have No Pantry
Choose one place to become the pantry. It might be a cabinet, cart, bookcase-style shelf, or part of a closet near the kitchen. Keep breakfast, snacks, grains, cans, and backup goods there.
Use clear bins for categories. Label them simply: pasta, baking, snacks, cans, sauces. Fancy labels matter less than being able to find dinner at 6 p.m.
If space is very tight, split the pantry into daily and overflow storage. Keep daily food in the kitchen. Put bulk packs or backup items on a nearby shelf.
If Your Counters Are Always Cluttered
Set a counter rule. Only daily-use items stay out. That usually means a kettle, coffee maker, dish soap, and maybe one cutting board.
If an appliance is used once a week, store it. If it’s heavy, keep it in a lower cabinet or on a sturdy cart.
Use wall space only when it’s lease-safe. Magnetic racks on the fridge, over-cabinet hooks, and under-shelf baskets usually give you storage without permanent changes.
If Your Cabinets Are Deep and Hard to Use
Deep cabinets need pull-forward storage. Use bins with handles, sliding baskets, or lazy Susan turntables. The goal is to stop food and tools from disappearing at the back.
Put tall items in the rear only if you can still see them. Store short items up front. That one change makes crowded cabinets much easier to use.
Best Renter-Friendly Organizers: No-Drill Options That Actually Work
No-drill storage is the renter’s sweet spot. It gives you function without permanent damage. The key is choosing the right type for the surface, load, and moisture level.

Image source: Web (Bing) / blibli.com (Web image (fair-use with source credit))
Over-cabinet hooks are great for towels, lids, cutting boards, and lightweight tools. Check that the door still closes before loading them. Add felt pads if the hook rubs against the cabinet finish.
Shelf risers are usually the fastest cabinet upgrade. They double usable vertical space for plates, mugs, bowls, cans, and pantry goods. Choose metal or sturdy plastic if you’re stacking dishes.
Tension rods can divide trays, cutting boards, lids, and baking sheets. They work best in narrow cabinets where pressure can hold them firmly. Don’t rely on them for heavy cookware.
Removable adhesive hooks can help, but surface matters. Painted walls, old cabinets, textured tile, and greasy backsplashes may not hold well. Follow the manufacturer’s wait time before adding weight.
The U.S. Consumer Product Safety Commission warns about furniture tip-over risks, so treat freestanding shelves and pantry cabinets seriously. If you can’t anchor a tall unit, keep heavy items low.
Avoid top-heavy storage in narrow kitchens.
Use this quick comparison before choosing.
| Organizer type | Best for | Watch for |
|---|---|---|
| Shelf risers | Plates, mugs, cans, pantry goods | Cabinet height |
| Under-shelf baskets | Wraps, towels, light pantry items | Shelf thickness |
| Over-door racks | Spices, lids, snacks | Door closure |
| Magnetic storage | Fridge sides, knives, spice tins | Weight and grip |
| Rolling carts | Pantry overflow, appliances | Floor space and stability |
Small Kitchen Setup Workflow: Zones, Measurements, Labels, and Weekly Reset
A small kitchen works better when every item has a job and a zone. Think in five zones: prep, cooking, cleaning, pantry, and food storage. If something doesn’t fit a zone, it probably doesn’t belong in the kitchen.
Start with the prep zone. Keep cutting boards, mixing bowls, knives, and everyday utensils close to your main counter space. If you have almost no counter, use a sink cover board or portable cart as extra prep space.
Your cooking zone belongs near the stove. Store pans, oils, spices, tongs, and spatulas nearby. Keep flammable paper goods, plastic containers, and towels away from burners.
The cleaning zone should sit near the sink. Use a caddy for sprays, sponges, dishwasher tabs, and trash bags. Under-sink organizers must leave room for pipes and moisture checks.
Use labels only where they help you repeat the system. Label pantry bins, freezer zones, shared roommate shelves, and backup supplies. Skip labels for obvious daily items.
A weekly reset keeps the system alive:
- Clear the counters.
- Return stray items to zones.
- Check the “use first” food bin.
- Match containers and lids.
- Wipe shelves, handles, and the stovetop.
- Move anything unused back to its proper zone.
This takes 10 to 15 minutes once the kitchen has a real home for everything. That’s the point. Good organization shouldn’t need a whole Saturday every month.
If you share the kitchen, make zones visible. Give each roommate one bin, shelf, or labeled section. Shared kitchens fail when everyone has a different mental map.
Mistakes That Cost Renters Space, Money, or Their Security Deposit
The biggest mistake is buying organizers before measuring. A pull-out bin that’s half an inch too tall becomes clutter itself. Measure the inside of the cabinet, not the front frame.
Another common miss is trusting adhesive storage with too much weight. Manufacturer specs list weight limits under ideal conditions. Grease, steam, textured paint, and old cabinet finishes can weaken the hold.
If you use adhesive hooks, clean the surface first and let it dry fully. Press firmly for the time listed in the instructions. Wait before loading it, especially for heavier tools.
Watch out for these renter-specific problems:
- Drilling into tile, cabinets, or walls without written approval
- Using adhesive strips on peeling paint or weak finishes
- Blocking vents around appliances
- Storing paper towels, oils, or plastic near the stove
- Overloading over-door racks until the hinge shifts
- Putting cleaning supplies beside open food
- Using tall freestanding shelves with heavy items at the top
- Covering leaks or damp spots with bins
Under-sink storage needs extra care. If you see moisture, staining, swelling wood, or a musty smell, don’t cover it with bins and pretend it’s fine. Use a removable tray, keep supplies in a caddy, and report leaks early.
Also avoid organizing around items you don’t use. If the waffle maker gets a prime cabinet and your everyday pan is hard to reach, the system will fall apart. Prime space should go to daily-use items first.
The best rule is simple. If a storage idea could damage a surface, block airflow, tip over, or trap moisture, choose a different method.
Frequently Asked Questions
How do renters organize a small kitchen without drilling?
Use freestanding, over-door, under-shelf, magnetic, tension-mounted, and removable adhesive storage. Start with shelf risers, drawer dividers, clear bins, and a narrow rolling cart if you need pantry space. Keep heavy items low and avoid putting pressure on weak cabinet doors or painted surfaces.
What should stay on the counter in a small rental kitchen?
Only daily-use items should stay on the counter. For most renters, that means dish soap, a sponge, a coffee maker or kettle, and one small prep item. Store weekly-use appliances in a cabinet, closet, or rolling cart so prep space stays open.
How do I organize a rental kitchen with no pantry?
Pick one pantry zone and keep all dry goods there. A narrow rolling cart, freestanding shelf, spare cabinet, or nearby closet shelf can work. Use clear bins for snacks, cans, grains, baking items, and overflow groceries so food doesn’t disappear in the back.
Are adhesive hooks safe for rental kitchens?
Adhesive hooks can be safe if the surface is clean, smooth, dry, and compatible with the product. They’re risky on peeling paint, wallpaper, greasy tile, and damaged cabinets. Always follow the listed weight limit and remove them slowly during move-out.
What’s the cheapest way to make a small kitchen feel bigger?
Declutter first, then clear the counters. Add shelf risers inside cabinets, use drawer dividers, and move rarely used appliances out of prime space. These changes usually cost less than new furniture and make the kitchen feel easier to use right away.
How often should I reset an organized rental kitchen?
A 10 to 15 minute weekly reset works well for most small kitchens. Clear counters, return items to zones, check the “use first” bin, and match food containers with lids. Do a deeper pantry and duplicate-item check once a month.